
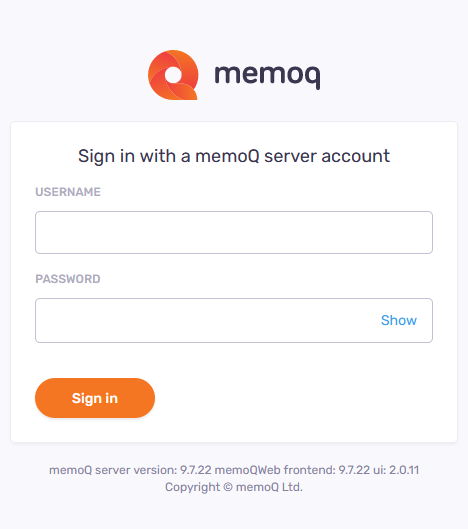
1. Open up and log into the memoQ web from your web browser.
- The URL that takes you to memoQ web is http://tms.vengacorp.com/memoqweb/
- Then log in with your username and password.
2. Check out projects that are assigned to you.
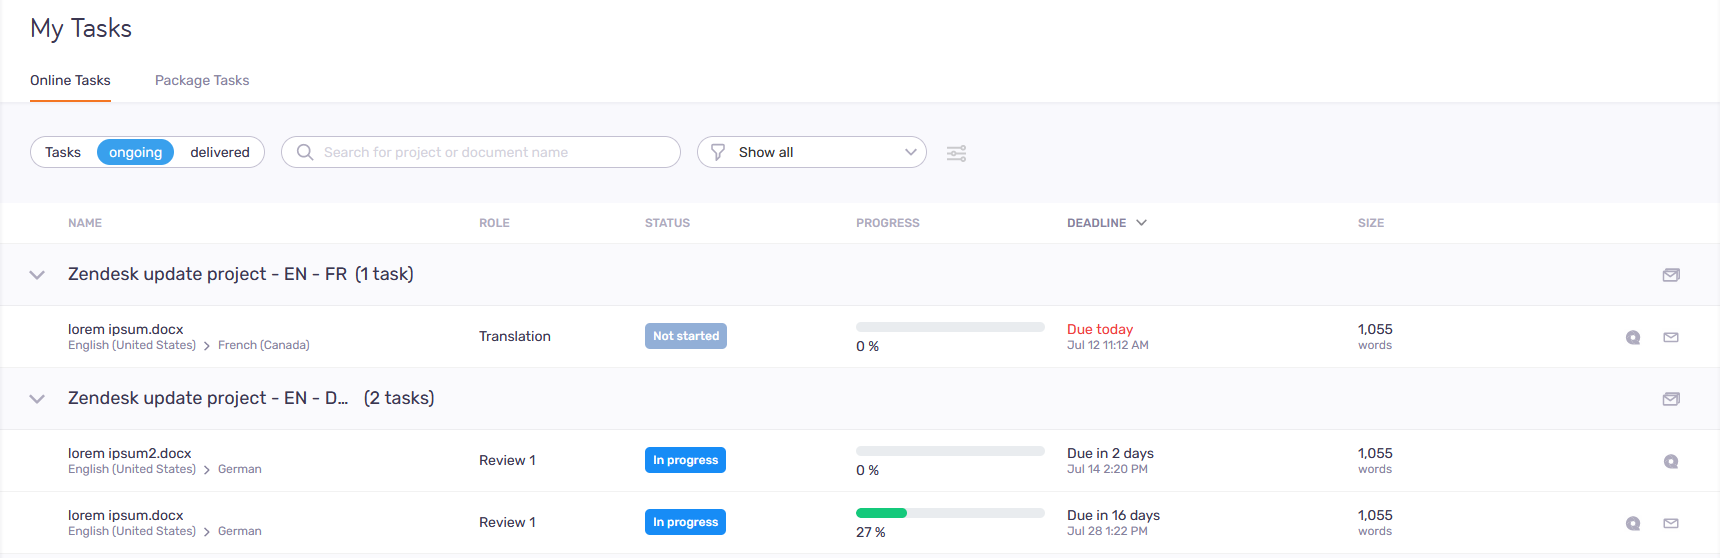
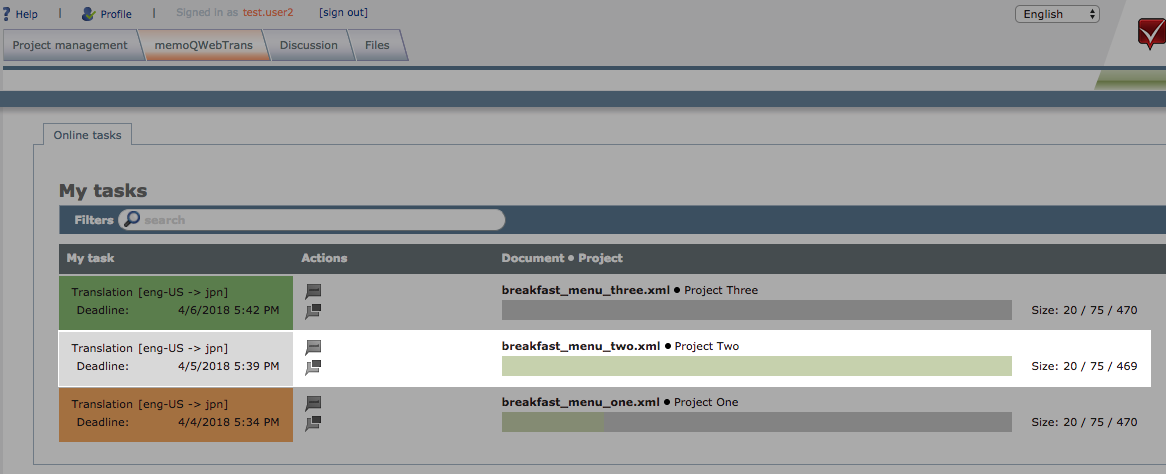
- Firstly, under the Online Tasks ribbon, you would see tasks assigned to you.
- Here you can see information regarding Project and file name, Role assigned to you, Status, Progress, Deadline and file size (word count)
3. Open the translation documents
To open the document for translation/revision, hover over the document and click the file name.

- The green color in the progress bar shows how much work has been done at this point. If hover over the percentage bar, you would see the Document progress (e.g. Translatior: 10%, Reviewer1: 2%, Reviewer2: 2%).
- When hover over the STATUS bar, the task will tell if it is ready for you to TRANSLATE. If you click on the document name, the file editor will open in a new window.
- To check out project using memoQ desktop application, click on the grey memoQ logo at the righ of the task bar.
4. Work in the Translation window
- Source and target texts in the translation window
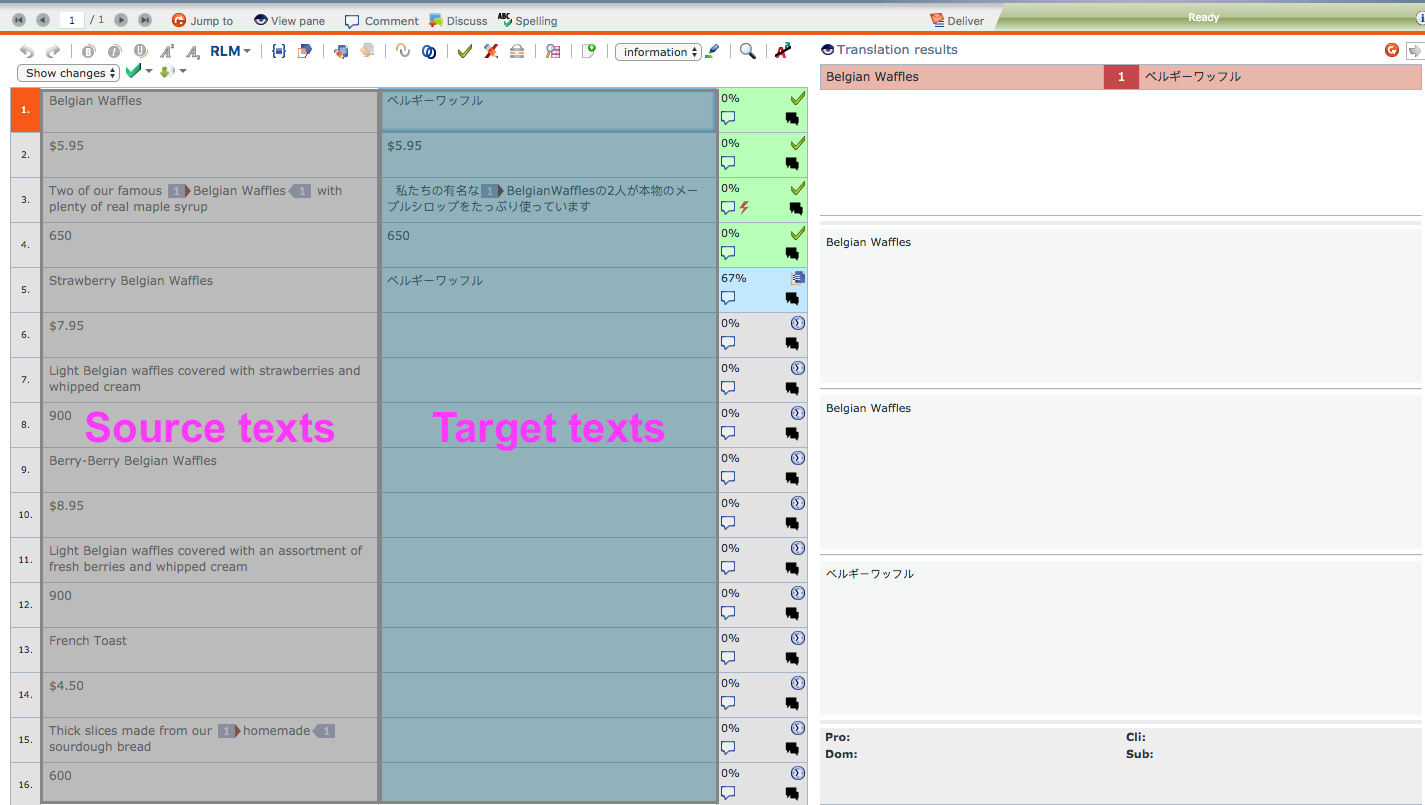
When the translation window opens up, you'll see the source texts on the left side and the target texts on the right. The target column is where the translation should be filled in.
- Translation results pane
The translation memory(TM) and term base(TB) match results would show up on the right side window under Translation results. The TM results by default are red and TB is blue.
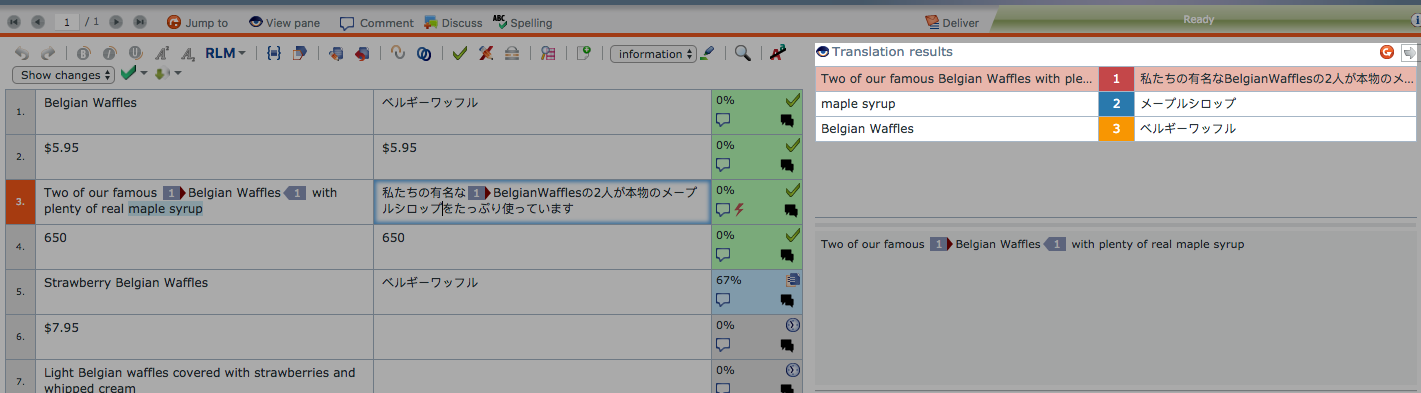
The orange color in the screenshot is the automated concordance / Longest Substring Concordance (LSC) hits. MemoQ attempts to retrieve the longest possible expressions that can be found by concordancing and tries to offer their equivalent too.
- Adding translation
To add the translation, click the text boxes on the translation side and place in your translation. After that, make sure to confirm your edits into the TM. To do that, simply click the green check mark (√) at the top or use the shortcut key Control + Enter. You can either confirm each segment as you go or confirm all the segments after complete the whole document in one go. To do the latter, just drag through and select all the segments and then click the green check mark or Control + Enter.
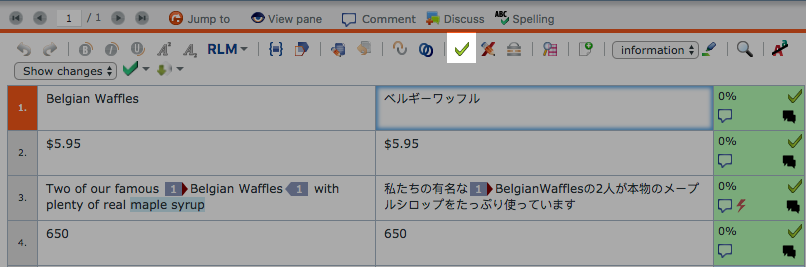
Once a segment is confirmed, the box next to the translation will turn into green.
- Apply formatting
To apply any formatting to the texts, like italics, bold, underline, etc, click the corresponding icons on the top ribbon.

- Insert tags
The blue tags inside the segments are normally codes that linguists should not touch or translate. If hover over the tags, you will see what the codes actually are. And the tags in the target should be placed at the same locations (i.e. semantically) as they are in the source.
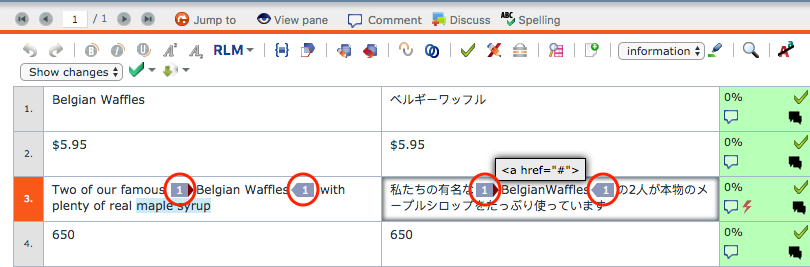
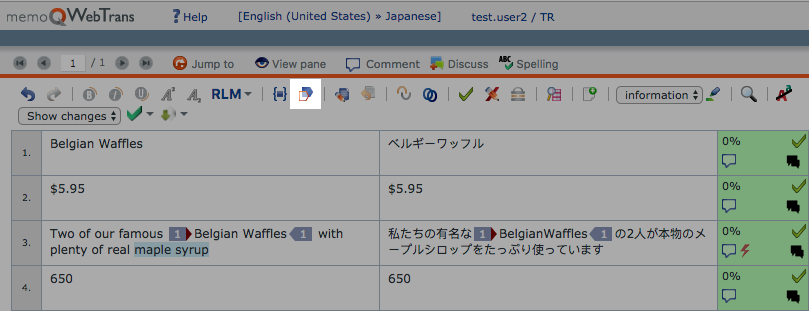
To insert a tag, you can just click the icon that says Copy next tag sequence.
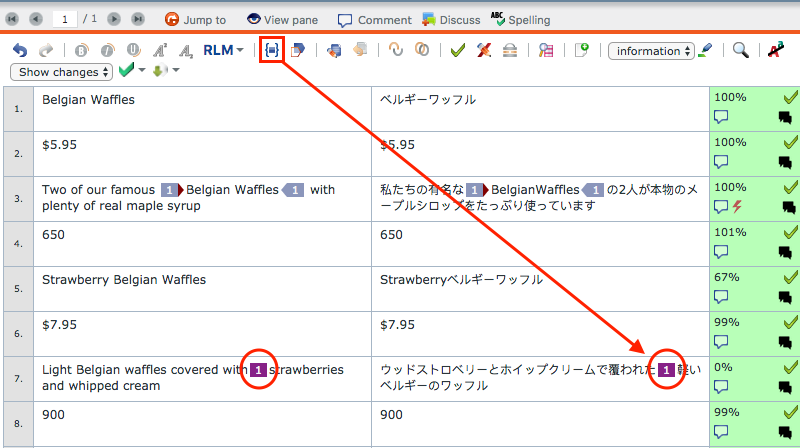
There may also be some formatted tags appearing in purple color inside the document. For that kind of tags, click the formatted tags icon to add it to the segment.
- Translation in context
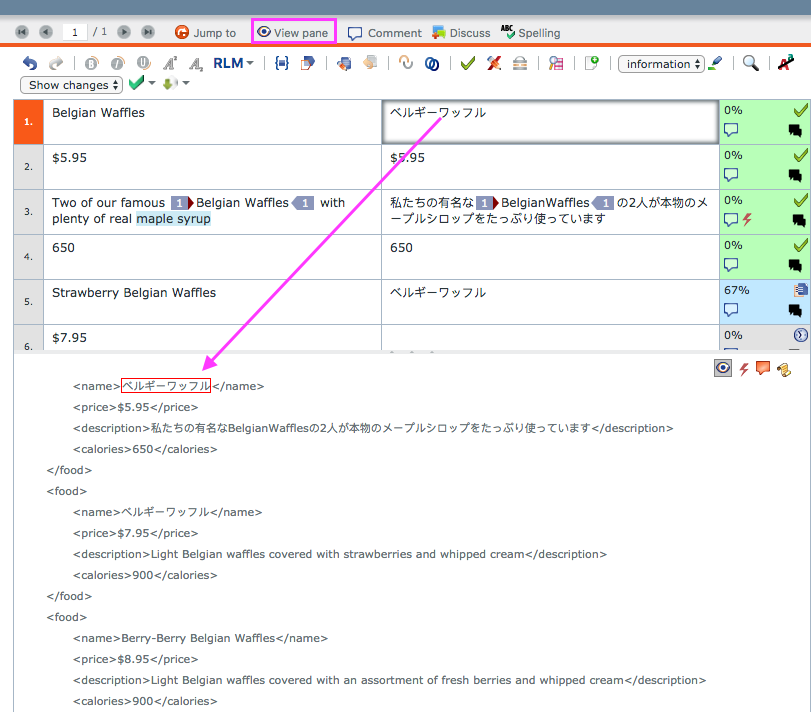
To view the translation showing in its original format/document, click the button showing at the top called View pane. While you click on the segment, the view pane shows where the corresponding texts showing up in the original format.
- Check the warnings.
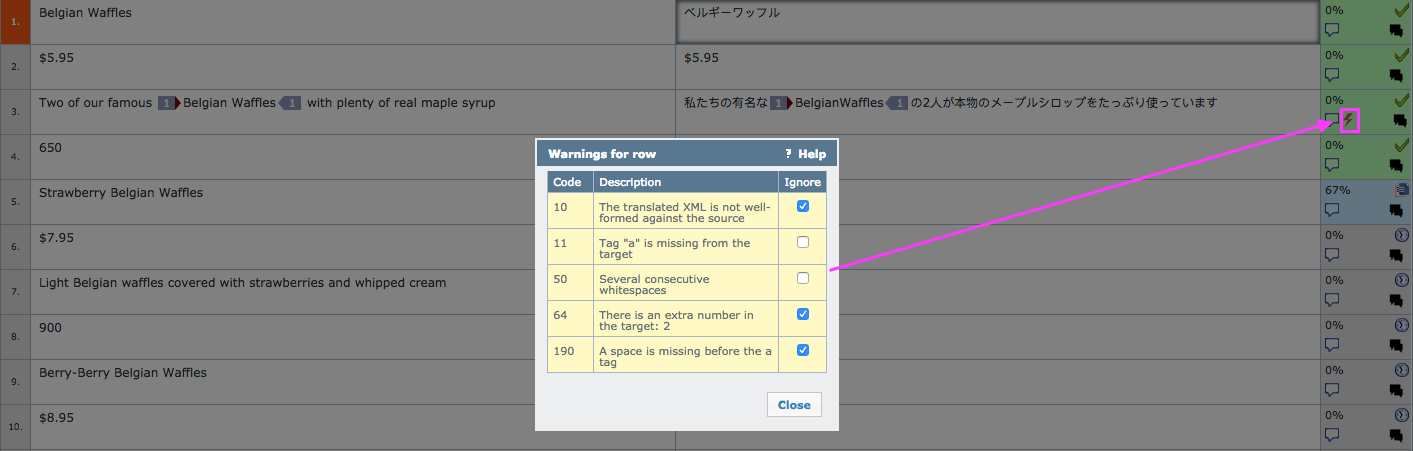
If there's a potential error, memoQ web would display a warning - a lightening icon ( ). Double clicking it, you would see what the warnings are. If they are false positives, just click the boxes under Ingore and hit close.
5. Deliver your translation
- To deliver the files, firstly, make sure that all the segments are confirmed (i.e. with a green check beside each segment). Then click the button at the top that says Deliver.
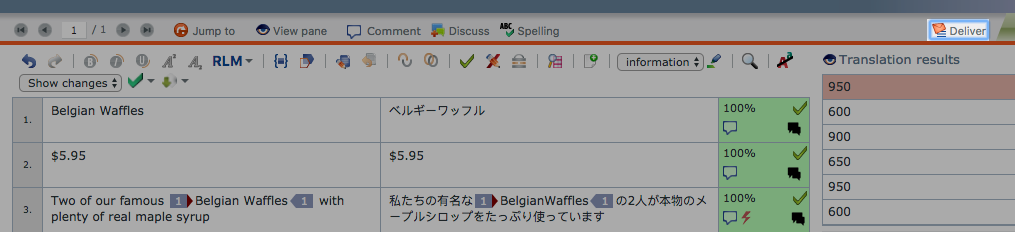
A window pops up at this point and then click OK

Or you can click the mail icon to deliver your work from the My tasks window

- Now the document has been delivered successfully with its color turned to grey and ready for review.
0 Comments